
Once the templates are verified and activated, users can start using those templates to generate, save, download PDFs and email it to Recipients as attachment.
Create PDF & Email: End Users can go to the record , click ‘Create PDF and Email’ button, select appropriate PDF template, preview the PDF & email the PDFs as attachment to the recipients added to the record. In this option, PDF are be saved under Files and Notes & Attachment related list as well. This is good option to test new templates where users can preview the PDF before emailing to external recipients. Here is the step-by-step process for this option – https://gocloudz.com/documentations/create-pdf-and-email/
Create PDF: This option allows your users to just preview and save the PDF to Salesforce but not email it to the recipients. In this case, PDFs are saved under Files and Notes & Attachment related list. Here is the more details of this option – https://gocloudz.com/documentations/create-pdf/
Download PDF: This option allows users to Download the PDF to desktop. This can be useful if you are generating lot of PDF documents and Salesforce storage is a constraint or if you have an external system/process for emailing the PDF documents. Here are more details of this option – https://gocloudz.com/documentations/download-pdf/
Take advantage of PDF Rules to automate PDF Generation and Emailing. The rules will trigger based on record changes. For example, PDFs can be generated and emailed to Recipients when Opportunity is Close-Won or Quote is Approved. The PDF Template specified on the PDF Rule is used for generating the document and the email template specified on the PDF Rule is used for sending the email.
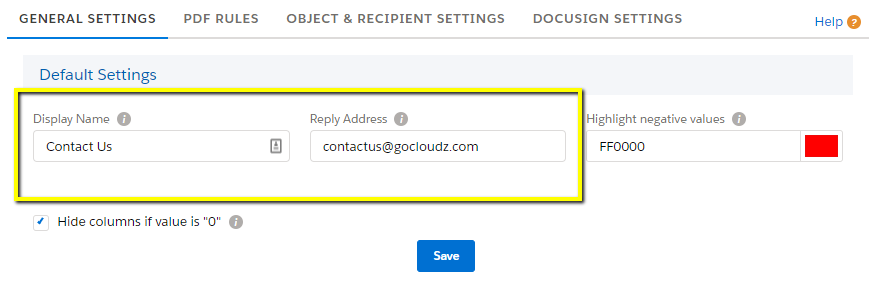
By default, the email address and the name for the email sent will be of the user who initiated the mail manually or through the automated process. You can configure the settings to show generic Name and Email. For example, “Company Name” and “accounts@company-name.com”
To specify the default values, go to PDF Settings tab >> General Settings >> Default Settings
Note:
