
Following are the key benefits of integrating Docusign with PDF Generator –
Pre-Requisite:
Following are the steps Docusign integration –
Connect Docusign and Salesforce as per this tutorial [Only 1 to 3 steps are needed for eSignature] –
https://success.docusign.com/gen-negotiate/checklist/gen#step-2
(This is the managed package link mentioned in the tutorial – https://appexchange.salesforce.com/appxListingDetail?listingId=a0N30000001taX4EAI)
Please ensure that the user account used to connect Docusign is assigned a PDF Generator license else you won’t be able to see objects/fields specified in next steps.

From Docusign Admin, configure objects based on the object being used in PDF Templates. For example, if PDF Template has been designed for Quote, configure only Quote here but if it’s designed for multiple objects like Quote and Opportunity, configure it for both objects as shown below. It can be custom object as well.

Below is the configuration for the individual object. Envelop IDs need to be mapped between SFDC & Docusign.
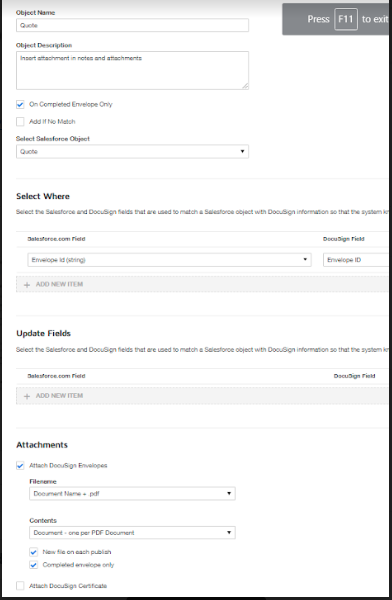
If “Envelope Id” field does not exist, please create one in your Salesforce org for that object. It can be Text (100) data type.
Once above configurations are completed in Docusign, next step is to configure Salesforce Org which is connected to Docusign.
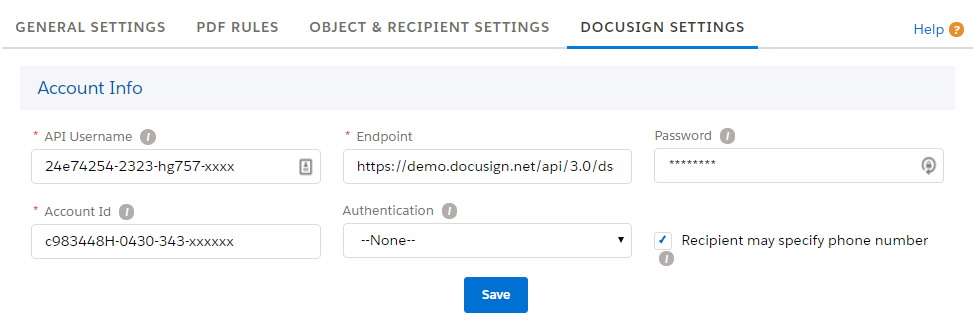
1. Go to PDF Settings tab >> Docusign Settings to configure Docusign related information.
Enter Docusign information under “Account Info” section. This account will be used for authentication purpose. You can get following details by logging into your Docusign portal under API and Keys in left menu.
Notes :
API Username (SFDC) -> User ID (DS)
Account Id (SFDC) -> API Account ID (DS)
3. For Endpoint use following URLs –
If connected to demo account of DS – https://demo.docusign.net/api/3.0/dsapi.asmx
If connected to Production account of DS – https://www.docusign.net/api/3.0/dsapi.asmx
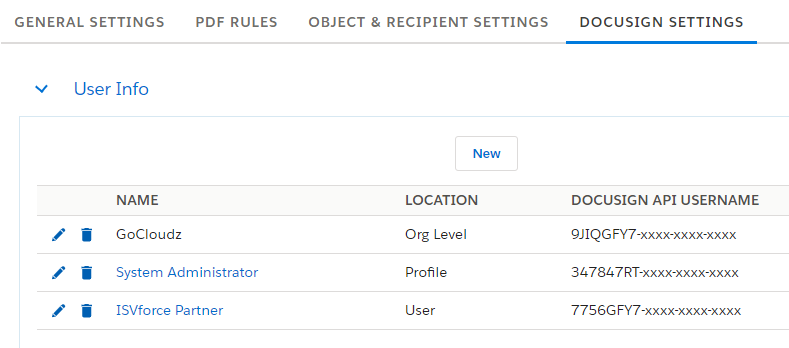
2. Add this user details under User Info as well –
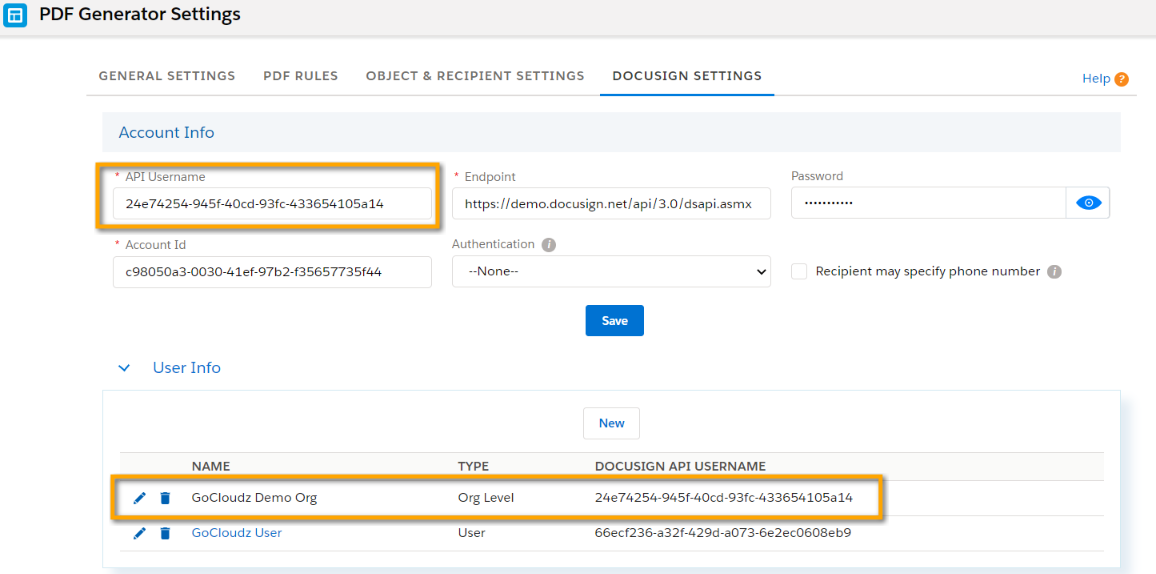
Optionally, you can configure additional Docusign users under “User Info” section who are also PDF Generator user in SFDC, if document needs to be generated and sent as that user. In this case, From email will show that user name. If users are not added here, email will be sent using account setup in the step above.
There are 3 options for location
3. Recipients & Email settings : Go to Recipients tutorial & check ‘Recipient Automation’ section to personalize default e-signature email subject and body for respective object when users receive the email from Docusign.
You can also configure to automatically add recipients and how they receive the document.
Note: When a Recipient is specified as ‘CC’ in “Receive Email As” field, that recipient will receive the signed document copy when all other signers have signed the document and signer role is optional in that case.
4. Add Docusign tags in PDF Templates where recipient is supposed to sign and put other details as per this tutorial – https://gocloudz.com/documentations/docusign-standard-and-custom-tags/
5. Add following components on the page layout of the respective object
a. “Create PDF and E-Signature” button/action
b. “Recipients” and “Docusign Status” related lists
6. Optionally, you can enable Multi-Factor authentication so that recipients will have to authenticate before signing the document. Please check this tutorial for more details.
You are now ready to test. Please check this tutorial for the end user experience.
If you are using e-Signature feature for any object other than Account & Opportunity, following are the additional steps required in order for “Docusign Status” related list to populate under that object –
1. Create custom lookup field in the Docusign Status object, which is a custom object provided as part of the Docusign package.
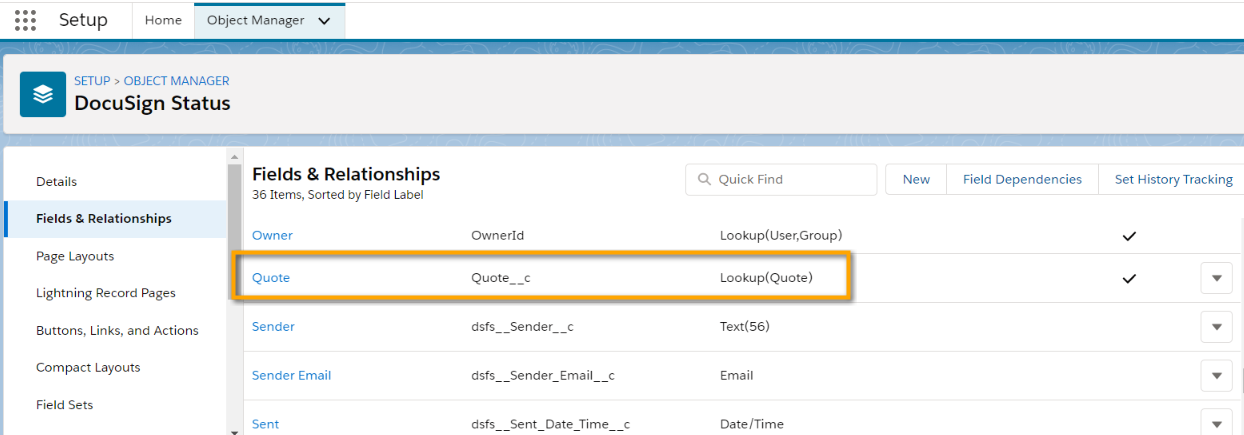
2. Add field mapping in Docusign for “dsfs_Docusign_Status__c” connect object –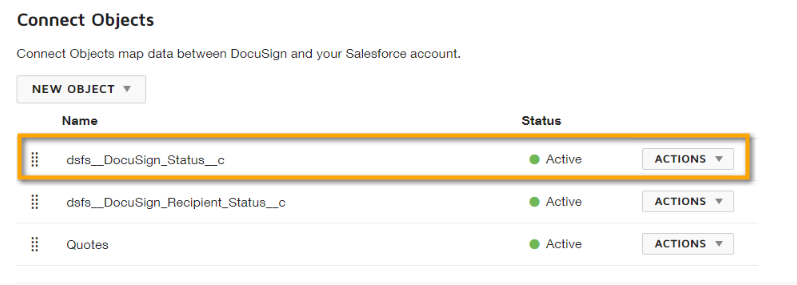
For Quote Object:
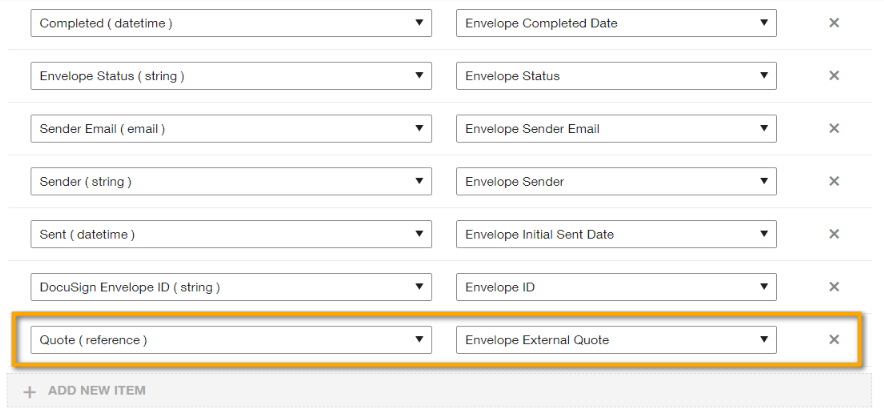
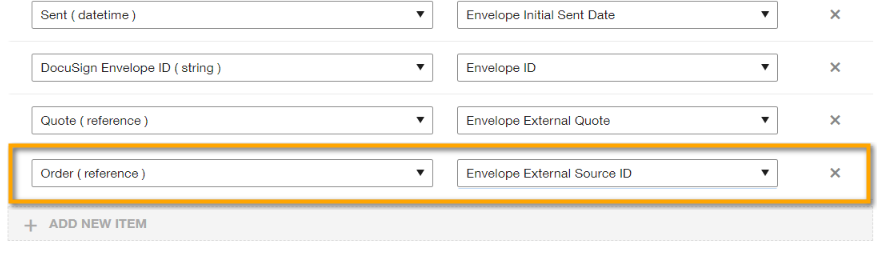
Docusign has reserved fields for certain standard objects only. For all other standard and all custom objects, use the “Envelope External Source Id” field to map to the lookup field created above in step 1. Assuming the lookup field was created for the standard Order object in step 1 above, below screenshot shows how to map the field.
Create a custom button with below URL like we did for email feature. Replace My_Object__c with the API name of the object
Name: Create PDF and E-Signature
URL: /apex/sfcloud2__QuotePDF_Save?id={!My_Object__c.Id}&action=sendForESignature