This section provides details of PDF preview, creation & emailing as attachment end users. They can email the PDF to the recipients tied to the record, select on the email screen or enter email IDs in email screen.
Notes:
1. If end users are not able to see the template they need to use, please ensure PDF templates have been activated.
2. By default all templates are shown to the end users but if you want to show relevant templates to the end users based on business rule, check this section on restricting/filtering templates for end users.
3. If you want PDFs to be generated & emailed automatically, please see PDF Rules section on how to configure automation rules.
Lead, Quote, Opportunity & Order objects –
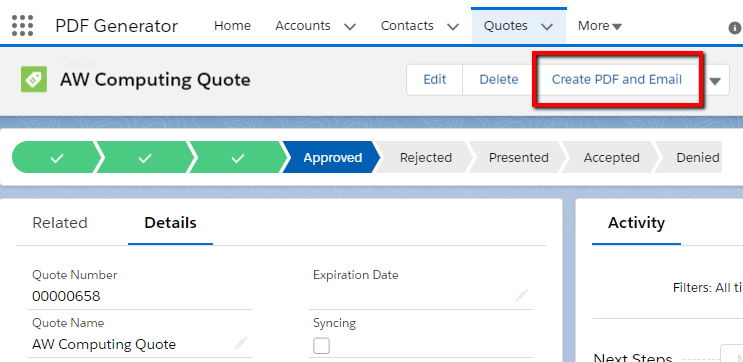
If you built template for one of these objects, we have provided a custom button named “Create PDF and Email” as part of the app. Please update page layout of respective object and add this button as mentioned below.
Other objects –
For other objects, create a custom button as per below details.
Create new button from “Button, Links and Actions” option on object setup page and fill the details as shown as below. This is the generic URL for the button where My_Object__c needs to be replaced with the object API name.
URL: /apex/sfcloud2__QuotePDF_Save?id={!My_Object__c.Id}&action=sendEmailFor example, if it’s standard Contact object, URL will be –
/apex/sfcloud2__QuotePDF_Save?id={!Contact.Id}&action=sendEmailIf it’s custom object with API Name Service_Object__c, URL will be –
/apex/sfcloud2__QuotePDF_Save?id={!Service_Order__c.Id}&action=sendEmail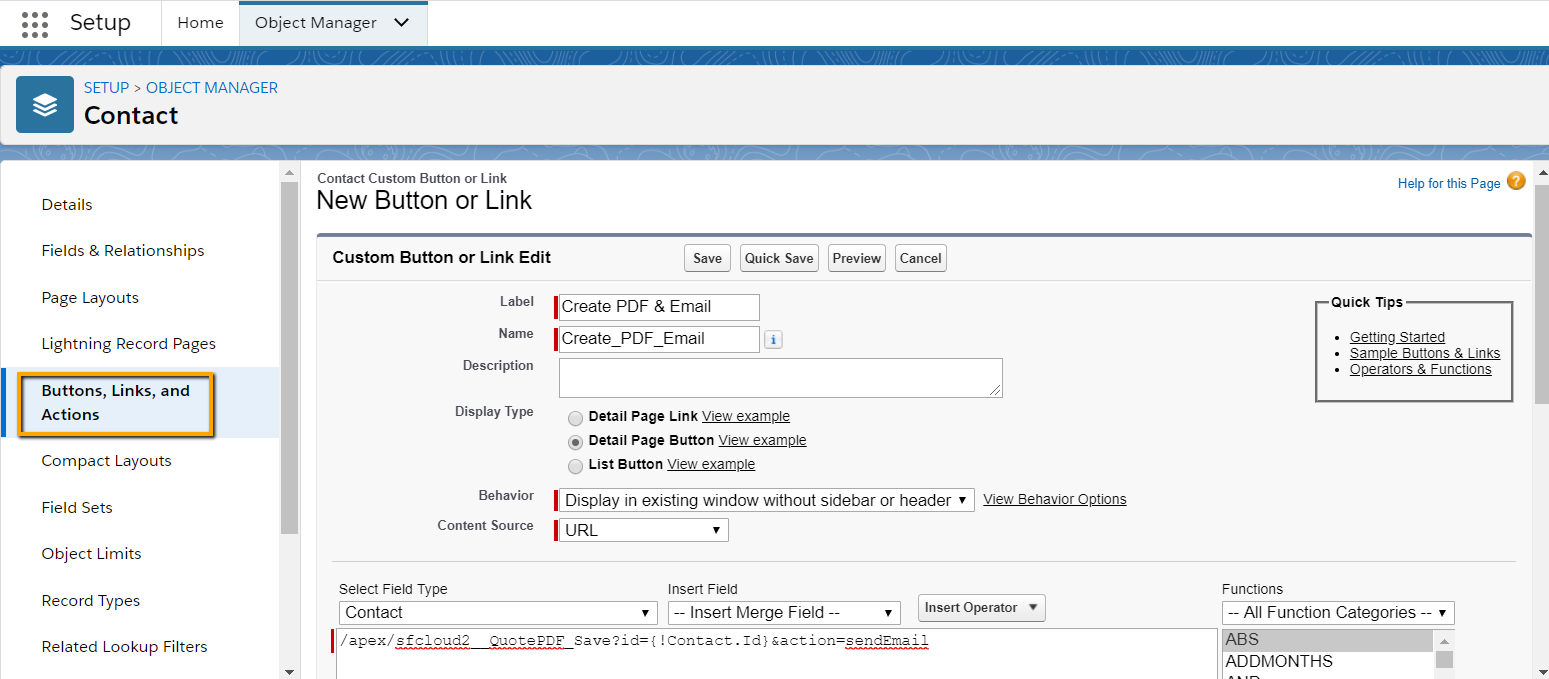
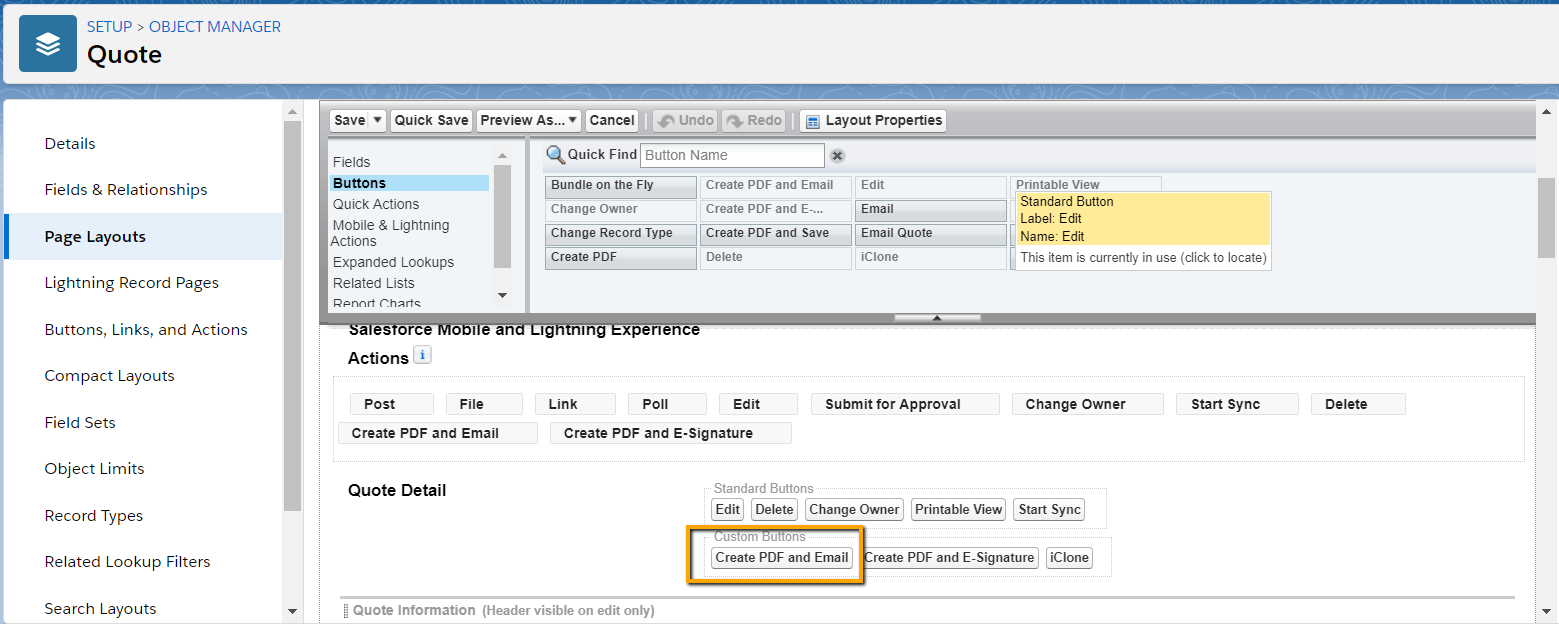
Modifying Page Layout –
Next step is to modify the object page layout to add the button. For Classic view, add this button to custom button area in the page layout-
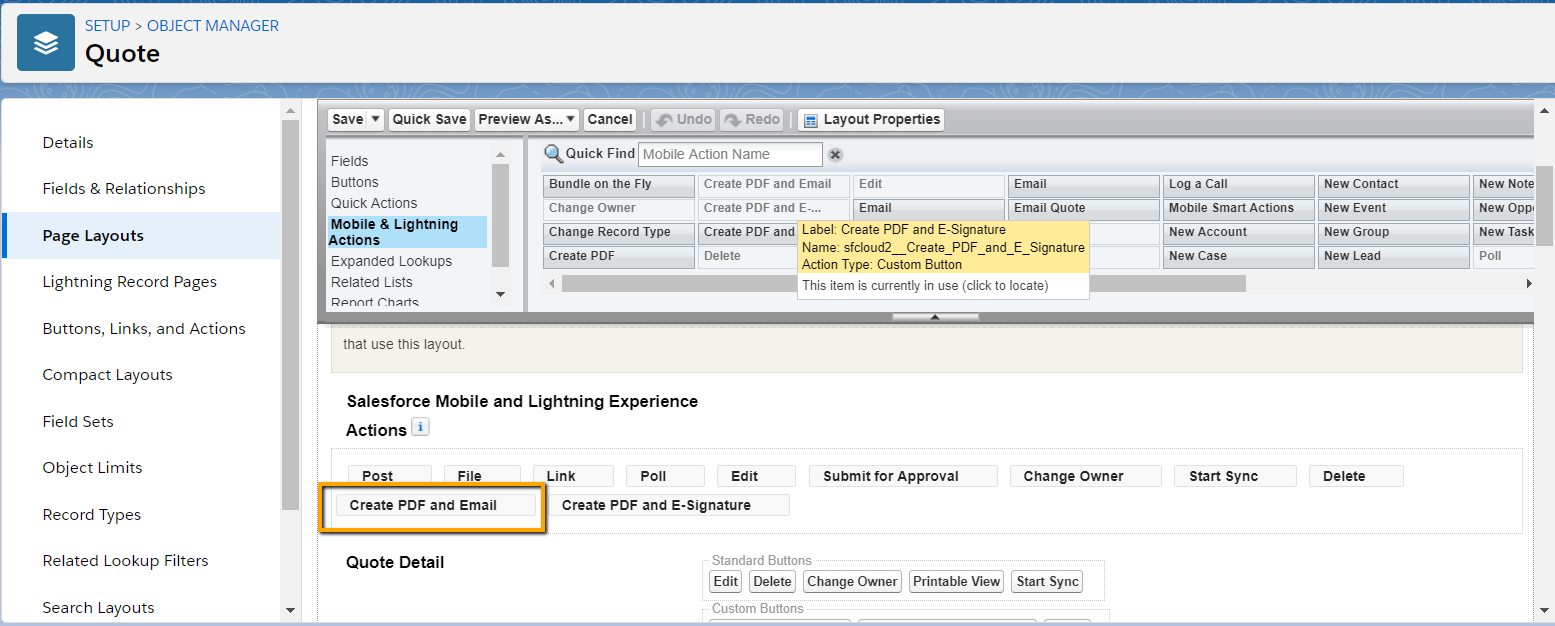
For Lightning view, please add the buttons to Mobile and Lightning Actions –
Recipients Configuration –
A lookup field is required to be created in Recipients object in order to configure Recipients. Please refer Recipients tutorial (last section) for details.
Here are the steps end user (Sales Rep) will follow to preview and email PDF.
1. User clicks on Create PDF and Email button.
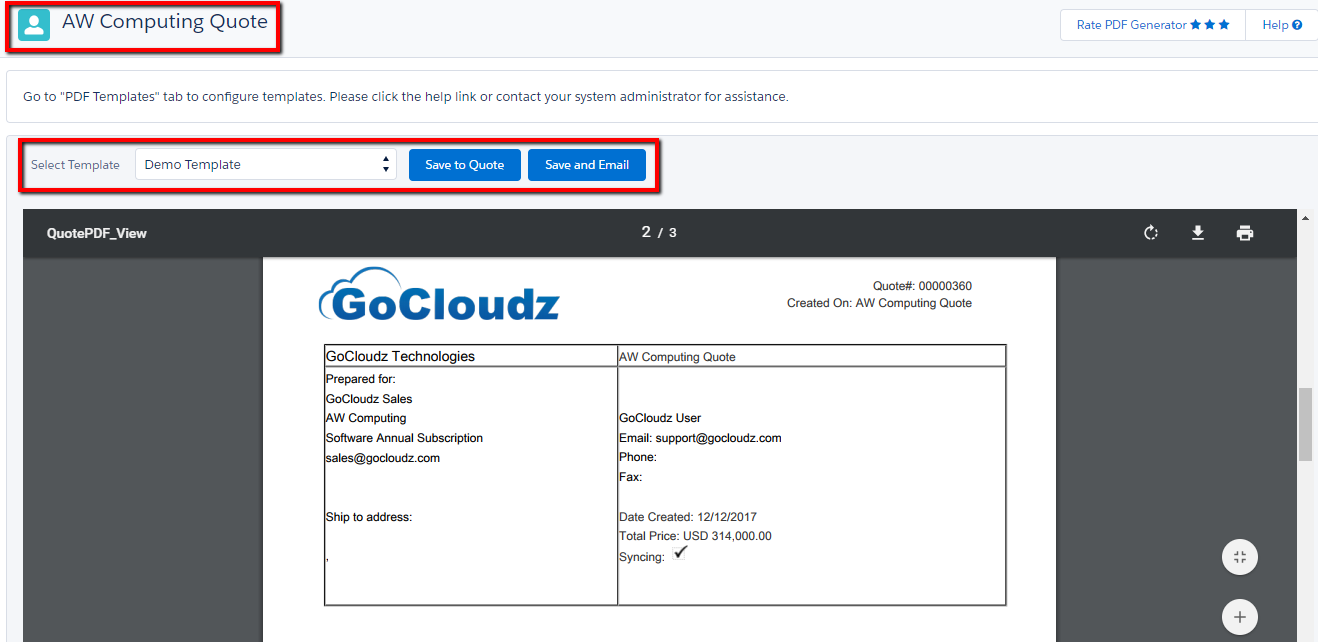
2. User is redirected to PDF Preview page which shows the record name on top-left and list of available templates in the drop-down list. Select a template to preview the PDF. User can then either save the PDF back to record or email it using “Save and Email” button.
Note: If only 1 template is available, it will be selected by default.
3. User will be redirected to Email screen if they selected “Save and Email” option. They can provide additional information like CC, BCC, Subject, Body, etc. PDF will be attached automatically to the email.
Please see Recipients section to automatically add users as To, CC, or BCC.
Email Subject & Body can be populated by default. Please see the “Email Settings” section below to configure content for Subject and Body. Alternatively users can also select an approved email template with the merge fields. Click “Insert Email Template” button to see the list of all the approved email templates. Add Attachments (Classic) or Files (Lightning) linked to selected email templates will be automatically added to the “Attachment” sections
Click “Attach Files” button to upload any other documents to this email.
Note: Please refer PDF Rules to automate the entire process. Your users will appreciate the time saved.

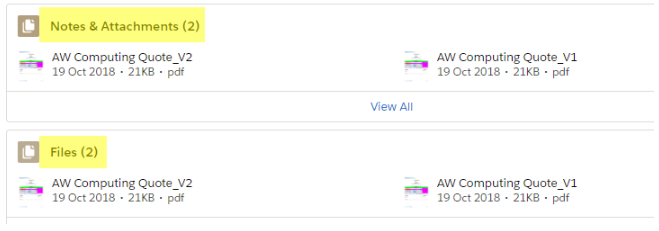
4. PDFs are stored under “Files” and “Notes & Attachments” section of the record.
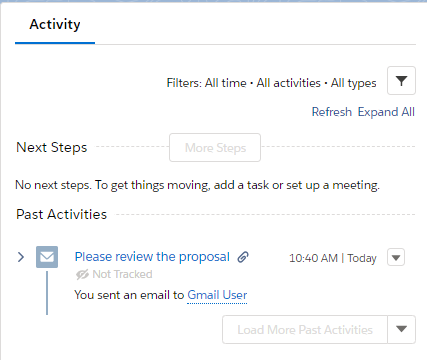
5. All email activity like when the email was sent, who sent it, whom it was sent to, attachments, etc. is stored under standard Activity section.
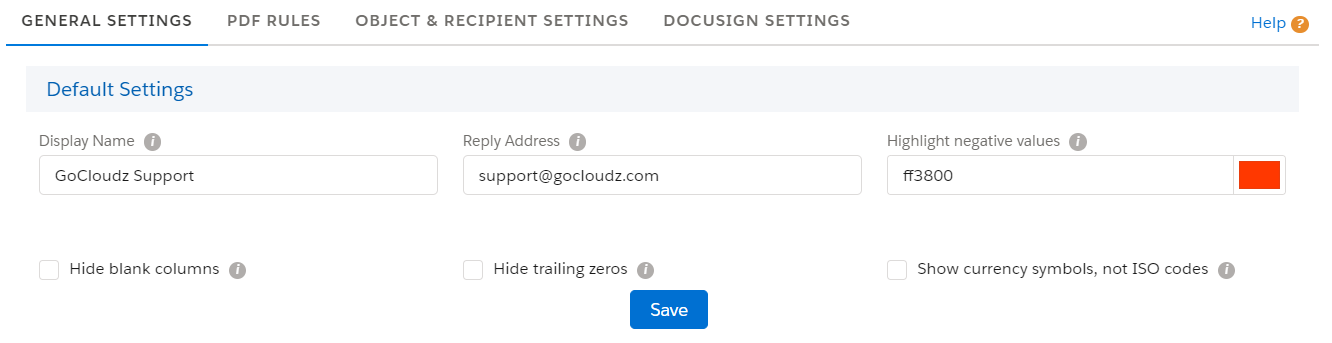
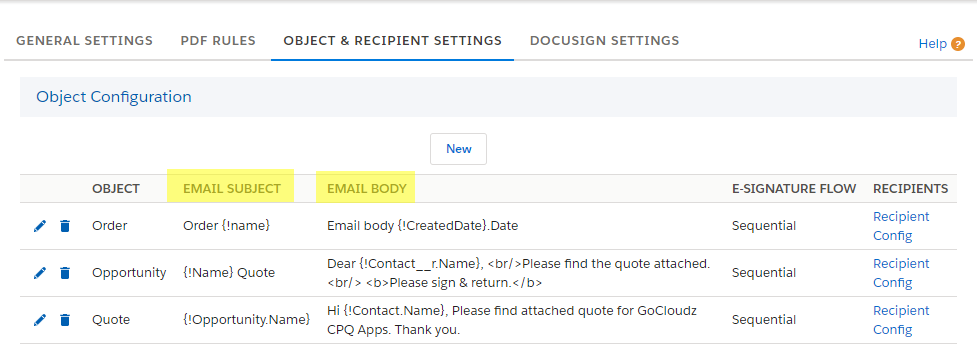
Go to PDF Settings tab >> Object & Recipient Settings >> Object Configuration to provide default email subject and body for each object. You can also include merge fields to dynamically populate data from Salesforce record. Users will have an option to override the default subject and body when sending emails manually or sending the document for e-signature.
“Display Name” & “Reply Address” can be set for email recipients under PDF Settings tab >> General Settings . For example, display name can be “GoCloudz Invoice” and reply address can be “sales@gocloudz.com”. Please note, the emails are still sent using the logged-in user email address.
To send emails from a different email id, please configure “Organization-Wide-Addresses” (OWA) and use that same email address as “Reply Address” in the screen below. The display name will be picked up from the OWA too. Please see this link for more information on OWA – https://help.salesforce.com/s/articleView?id=sf.orgwide_email.htm